In this tutorial I will show you how to be a surgeon in PS!
There are two parts to this tutorial. Cutting away the skin, and replacing the insides.
-----------------------------------------------------------------------------
The first part - Cutting, and adding depth.
Step 1: Open your image in Photoshop, choose any image you like. The pictures I'll be using for this tutorial can be found here, and here.
Step 2: Grab the lasso tool, and make sure the feather is set to 0. Start cutting out part of the image, and make it look as though the flesh was ripped apart!

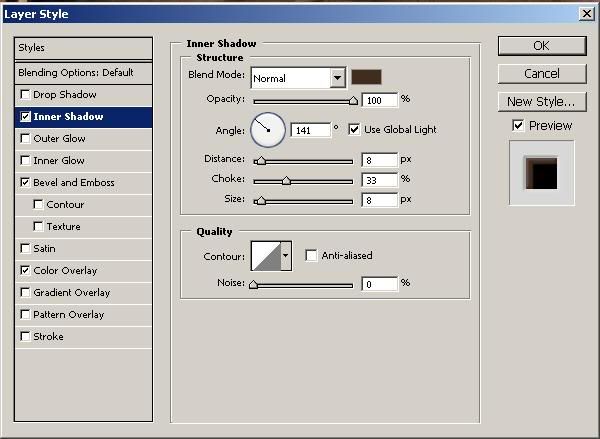
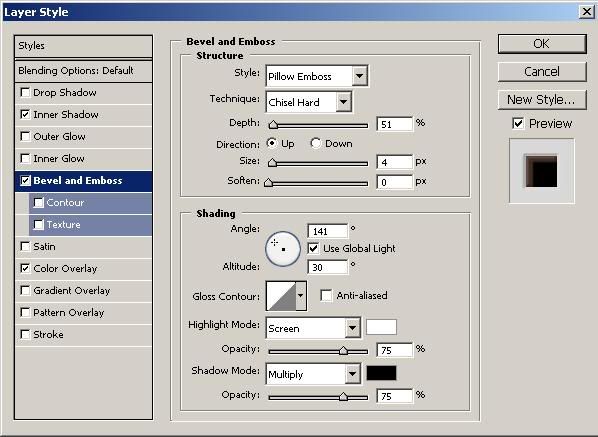
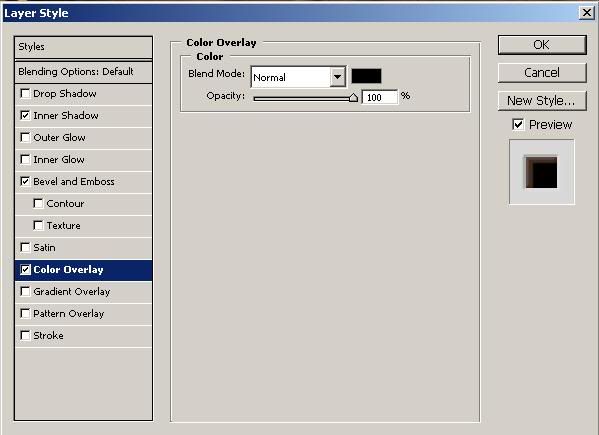
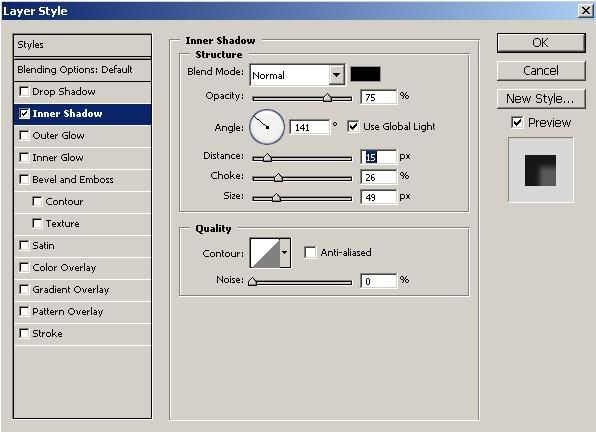
Step 3: Hit CTRL+J to add the selection to a new layer. Right click on the new layer and go to blending options. Apply an inner shadow, bevel & emboss, and color overlay. Use the settings below, make sure to use a color a bit darker than the skin color for the inner shadow.
It should look something like this:

Step 4: Now grab the burn tool, and apply some burn gently around the edges, make sure the main layer (body layer) is selected. Experiment with this, here is my result.

There you have it, the tutorial for cutting and adding depth. There are a ton of variations and ways to use this, just experiment and practice.
-----------------------------------------------------------------------------
The 2nd part - Replacing the insides
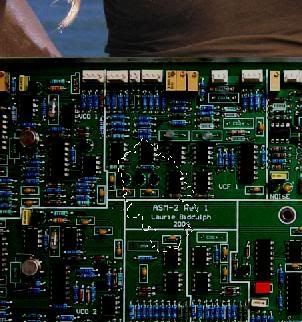
Step 1: Open up your image in PS, and move it to the image with the cut by dragging it and dropping. Adjust the brightness/contrast of the layer to match the image you're using it for.
Step 2: CTRL+CLICK on the cut-away layer from step 3 of the first part of this tutorial, and make sure the chipboard layer is selected. It should select the portion that u cut away, but in the chip image.
Step 3: Go to select>inverse and then go to edit, cut. This will delete the unneeded portion of the chip image. Next, add an inner shadow. Right click on the chip, and select blending options. Use these settings or similar.
That's it! You can play around with everything and get a totally different result, just have fun doing it!
Here is my finished result.


1 comment:
That is just a plain bad job.
Post a Comment