First, I want to say one thing. I DO NOT take credit for innovation here, I learned this technique a long time ago from another tutorial, and saved the key points in a notepad file(like always, it's a good habit), and want to share it with you guys. This tutorial may be hard for beginners, and I consider it advanced. Just a warning. This may be hard to read, and I used minimal images. Sorry about that, this took probably 2 or 3 hours to type up and work in photoshop at the same time, and I started getting a little lazy lol.
Ok, open a new file, and size you want. I'll be using 768x1024 for mine. It's best to use a larger height than width for this.Create a new layer, name it anything you want. I'm naming mine "Poster rectangle".
Next, grab the rectangle marquee tool and draw a rectangle on the "Poster Rectangle" layer.
Change the foreground color to a good beige color. I'll be using #e0d3ba for mine.
Fill your rectangle with the paint bucket tool, then deselect the rectangle by hitting CTRL+D.
Now change your foreground color again. This time, to a darker beige. I'll be using #cab387 for mine.
Now create a new layer, and name it something like blotches or something.
Fill this new layer with the darker color. Hit CTRL+ALT+G to clip the two layers.
Next, add a mask to the layer. This can be done by clicking the add layer mask button in the layers pallete. It's a little square with a white dot in the middle.
Now change your foreground and background colors back to white and black, hit D to do this.
Now add a clouds filter, Filter
Now move the sliders around on the levels window, to your prefference. They should all three be touching each other though.
Creat a new layer, name it dark blotches or something. This is going to be a second set of darker blotches.
Change the foreground color again, this time to something darker. I'll be using #a98b51 for mine.
Color the layer again with the paint bucket, and clip the layers with CTRL+ALT+G.
Add a mask, hit D to change the foreground colors back. Use the clouds filter again just as before. Adjust the levels again, just like before.
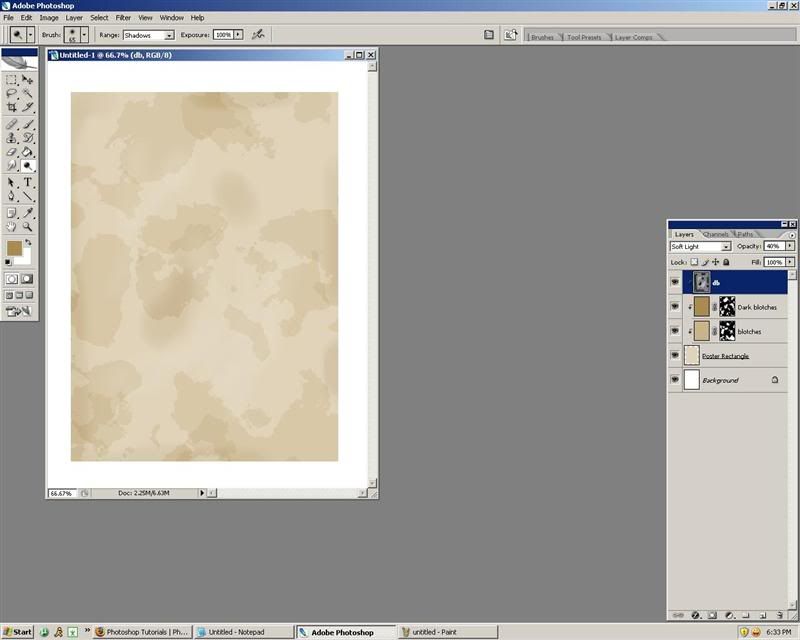
Change the opacity of the dark blotch layer to something between 15 and 20. Change the regular blotch layer to something between 35 and 40.
With the top layer selected, creat a new layer and name it anything you want. Go to edit>fill and set it to 50% gray in the use box.
Clip this layer (CTRL+ALT+G) and set the blend mode to soft light. I'm not sure what the point of this step was, but I had it marked as important.
Select the burn tool, and select a medium soft brush with a size according to your image size. I'll be using size 90. Set the range to shadows.
Now, start to burn some of the paper. Edges, middle, etc. Any part you want darker.
Now select the dodge tool, same settting, and make some of the areas lighter. Now change this layers opacity to 40-50.
here is a quick look of what I have so far.
Now, we ned to make some of the blotches a little blurry. Click on the dark blotch layer, and add a gaussian blur of 2-8 depending on your image size.
Experiment with this for best results. Do the same with the other blotch layer.
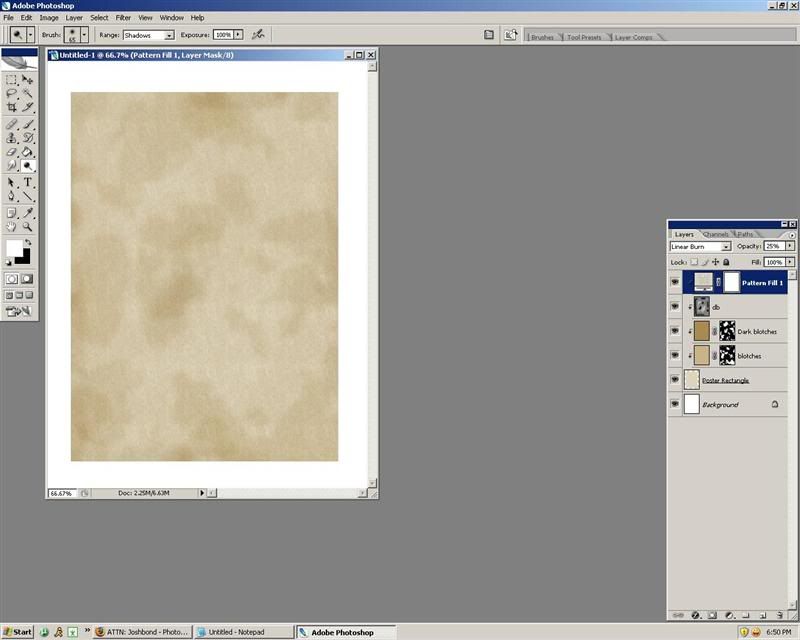
Now we need to add some texture to this baby. With the top layer selected, create a new fill layer by clicking on the little circle that's half black half white on the layers pallete. Use the texture option, and fill it with a rock>textured tile pattern. Make sure to set the scale to 60 when selecting the pattern.
Now change the blend mode to linear burn and the opacity to 25-35. Clip the layer with CTRL+ALT+G. Change the opacity to 35.
My result so far.
With the top layer selected, create a new layer. Go to edit>fill and select 50% gray in the use box. Set the blend mode to soft light.
Go to filter>noise>add noise. Use 10% and check the box that says monochomatic. Make sure the distribution is uniform as well. Clip this layer with CTL+ALT+G.
CTRL+Click on the rectangle layer to select it, go to menu and select>modify>contract. Put the value at 5. Add a mask to this layer by clicking the add mask button.
Now go to filter>brush strokes>spatter, and put 15 to 20 for both sliders. Select filter>blur>gaussian blur and use the number 1.
Go to image>adjustments>levels. Enter 160 - 1.00 - 195 in the input levels. This was to smooth out the edges a bit.
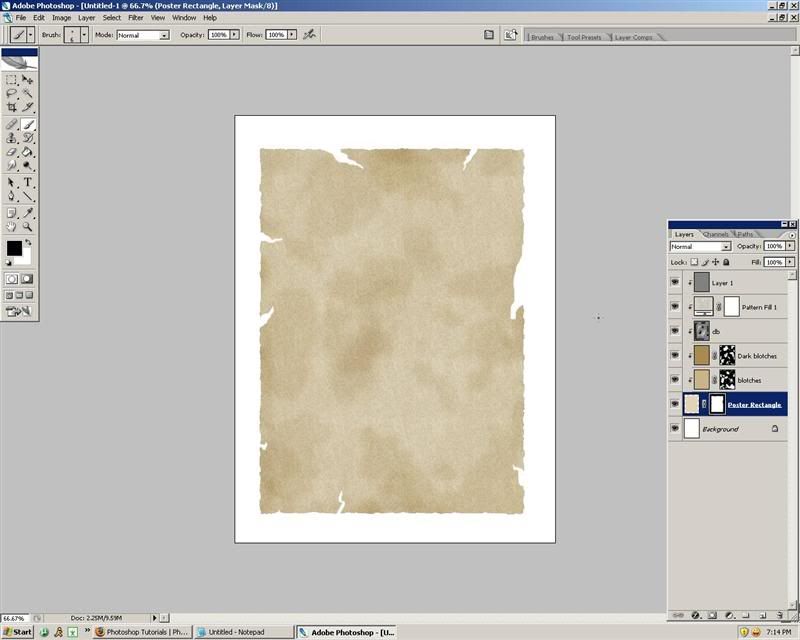
Get your brush tool, select a round brush with a hardness of 0 and a size of 1 to 10 depending on the size of your image. make sure the rectangle layer is active.
Hit D to change the foreground and bground colors back to normal, and hit x to switch the foreground to black if it isn't already.
Add some rips to the side of the paper with the black brush. It's a lot easier to zoom in and do this.
Here is what I have after adding some rips.
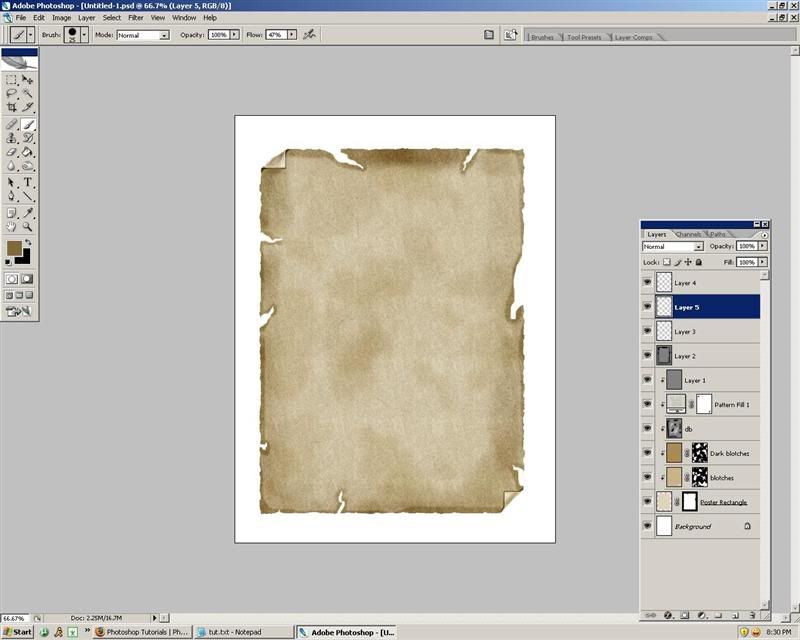
Now select the burn tool, select a medium soft brush with a size between 20-50. Set the range to shadows. Start making some of the edges a bit darker to add realism.
Now select a much bigger brush, 70 to 90, and set the exposure to 30 and go over the edges again.
Select the top layer, and create a new layer. Select the pencil tool with a size of 1 and opacity of 100. Make sure your foreground is set to black.
Draw some scratches on your image, and then hit X to switch colors, and draw some more scratches. Set the blend mode to soft light, and opacity to 45-50.
Select the rectangle layer, and grab the brush tool. Select a brush with a hardness of 100, a size of 10, and opacity and flow of 100.
Remove the top and bottom corner, at an angle opposite of each other. Right top and bottom left, right left and bottom right, etc. Only remove 2 corners though.
Click on the top layer, and add a new layer by hitting the add new layer button. Grab the rectangle marquee tool, and make a rectangle like the one in the screenshot below. It's to hard to explain.

Set the forground color to #dcceac and fill in the square with the paint bucket. Do the same thing with your other corner. Set the blend mode to lighten.
Now set the foreground color to a darker brown. I'm using #998257.Select a soft brush, size 1, and zoom in really close on the corner. Paint a curved line on the inside of your corner. The curve gives it the folded look, so you may want to experiment with this.
Do the same thing with the other corner.
I added some burn to the fold, to give it a more realistic look. Try this yourself and see how it comes out.
Click on the layer below this layer, and create a new layer so that it is under the folds layer.
Select a soft brush with a size of 25. Draw the shadow only ONCE under the fold.
This is what I have so far.
Now add a layer group. Click the little folder icon on the layers pallete. Now create a new layer.
Select the text tool, and begin writing whatever text you want. Rasterize each text layer by selecting the layer and going to layer>rasterize>type at the top.
Click on the layer group of the text layers, and change the opacity to 60. Add a layer mask to the text group by clicking the add layer mask button.
No go to filter>noise>add noise. Set the amount to 40, the distribution to uniform, and check the monochromatic box.
That's pretty much it for the text. You can warp it a bit with liquify to give a better appearance. That's up to you.
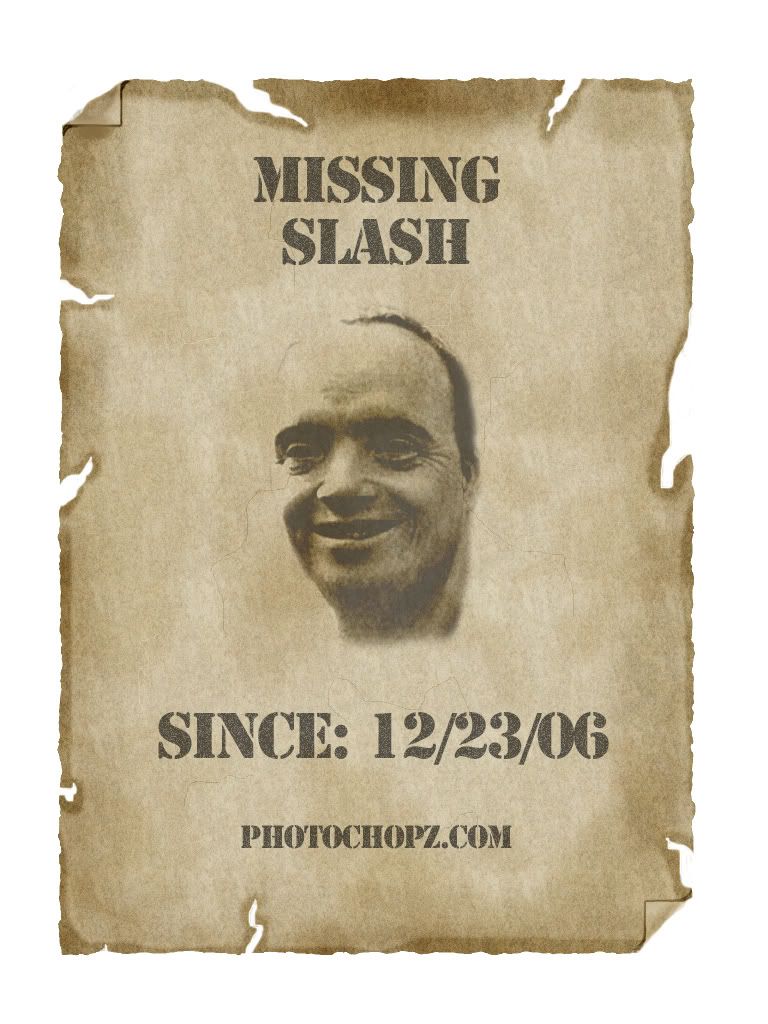
You can also add an image to it, and play around with it to get a decent effect.
Here is my end result for this tutorial..(inside joke for the site I made the tut for.)
Be creative, and most of all, have fun!


No comments:
Post a Comment